From a technical or sketched draft to a digital, hand-drawn design plan — in five quiet steps.
6 sets1 : 100300 dpiProcreate 5+
Thank you for choosing the PlanKit — I'm glad it's now travelling with you.
Anne Praetorius — Possenhofen
00 — Contents9 chapters
What this is about.
From setup to a finished design plan.
01
Welcome
02
What you need
03
Installation Guide
04
Scale & Setup
05
Workflow in five steps
06
Layer order
07
Brush reference
08
FAQ & Troubleshooting
09
License & Contact
Chapter 01Welcome
01
Foreword
Let's begin.
Built and refined from my own practice as a landscape architect — now it's yours, too.
AP LandSketch PlanKitUser Guide · V1
01 — WelcomeForeword
The PlanKit grew out of my own planning and drawing practice. While preparing design illustrations, I kept noticing the same elements coming up again and again: trees, shrubs, furniture, paving, recurring colour worlds. Every design is different — but a lot of the graphic building blocks keep returning from project to project.
That's why I built a brush set that bundles these recurring elements and makes the illustration process in Procreate easier. At the same time, it was important to me that my own drawing voice and design language stay visible in the plans.
Alongside the brushes, a workflow took shape that lets me illustrate design plans very efficiently — a hybrid approach that combines the strengths of digital drawing with the character of a hand-drawn plan. Work with layers, test variants, make changes quickly. And still keep the feel of a hand drawing.
The PlanKit is not a CAD tool and doesn't replace a technical plan. Procreate is pixel-based and works fundamentally differently from vector-based CAD software. The PlanKit understands itself as a design tool — it translates an already technically correct, to-scale plan into an atmospheric, emotionally tangible illustration.
These illustrations are especially useful when design ideas need to be communicated clearly: in client presentations, to building owners, in a project portfolio, or in communication with non-specialists.
What is the PlanKit for?
Design illustrations of plans in top-down view — at a reference scale of 1 : 100. The place where a technically correct plan becomes a mood-filled, emotionally graspable image.
Chapter 02What you need
02
Requirements
The tools for your plan illustration.
If you have these four things on hand, you're ready to start.
AP LandSketch PlanKitUser Guide · V1
02 — What you needRequirements
01 — Hardware
iPad + Apple PencilThe PlanKit was developed on an iPad Pro 12.9″ (1st generation, A1584). Apple Pencil 1 or 2 — either works. Newer iPad models with more memory have the advantage of more available layers in Procreate.
02 — Software
ProcreateiPad only — no Android, no desktop version. Version 5 or newer, a one-time purchase of about 14.99 € on the App Store. No special features required.
03 — File
Reference planPDF or JPG. CAD export or a scanned sketch. Must include a scale reference (scale bar, known measurement or a marked 1-metre line).
04 — Brush set
AP LandSketch PlanKitThe brush set is the heart of the PlanKit. Alongside it the kit includes two optional canvas templates (A3 and A4) with example layer structures to get you started, plus the colour palette; the guide is included as a PDF and is also available online.
The reference plan as foundation
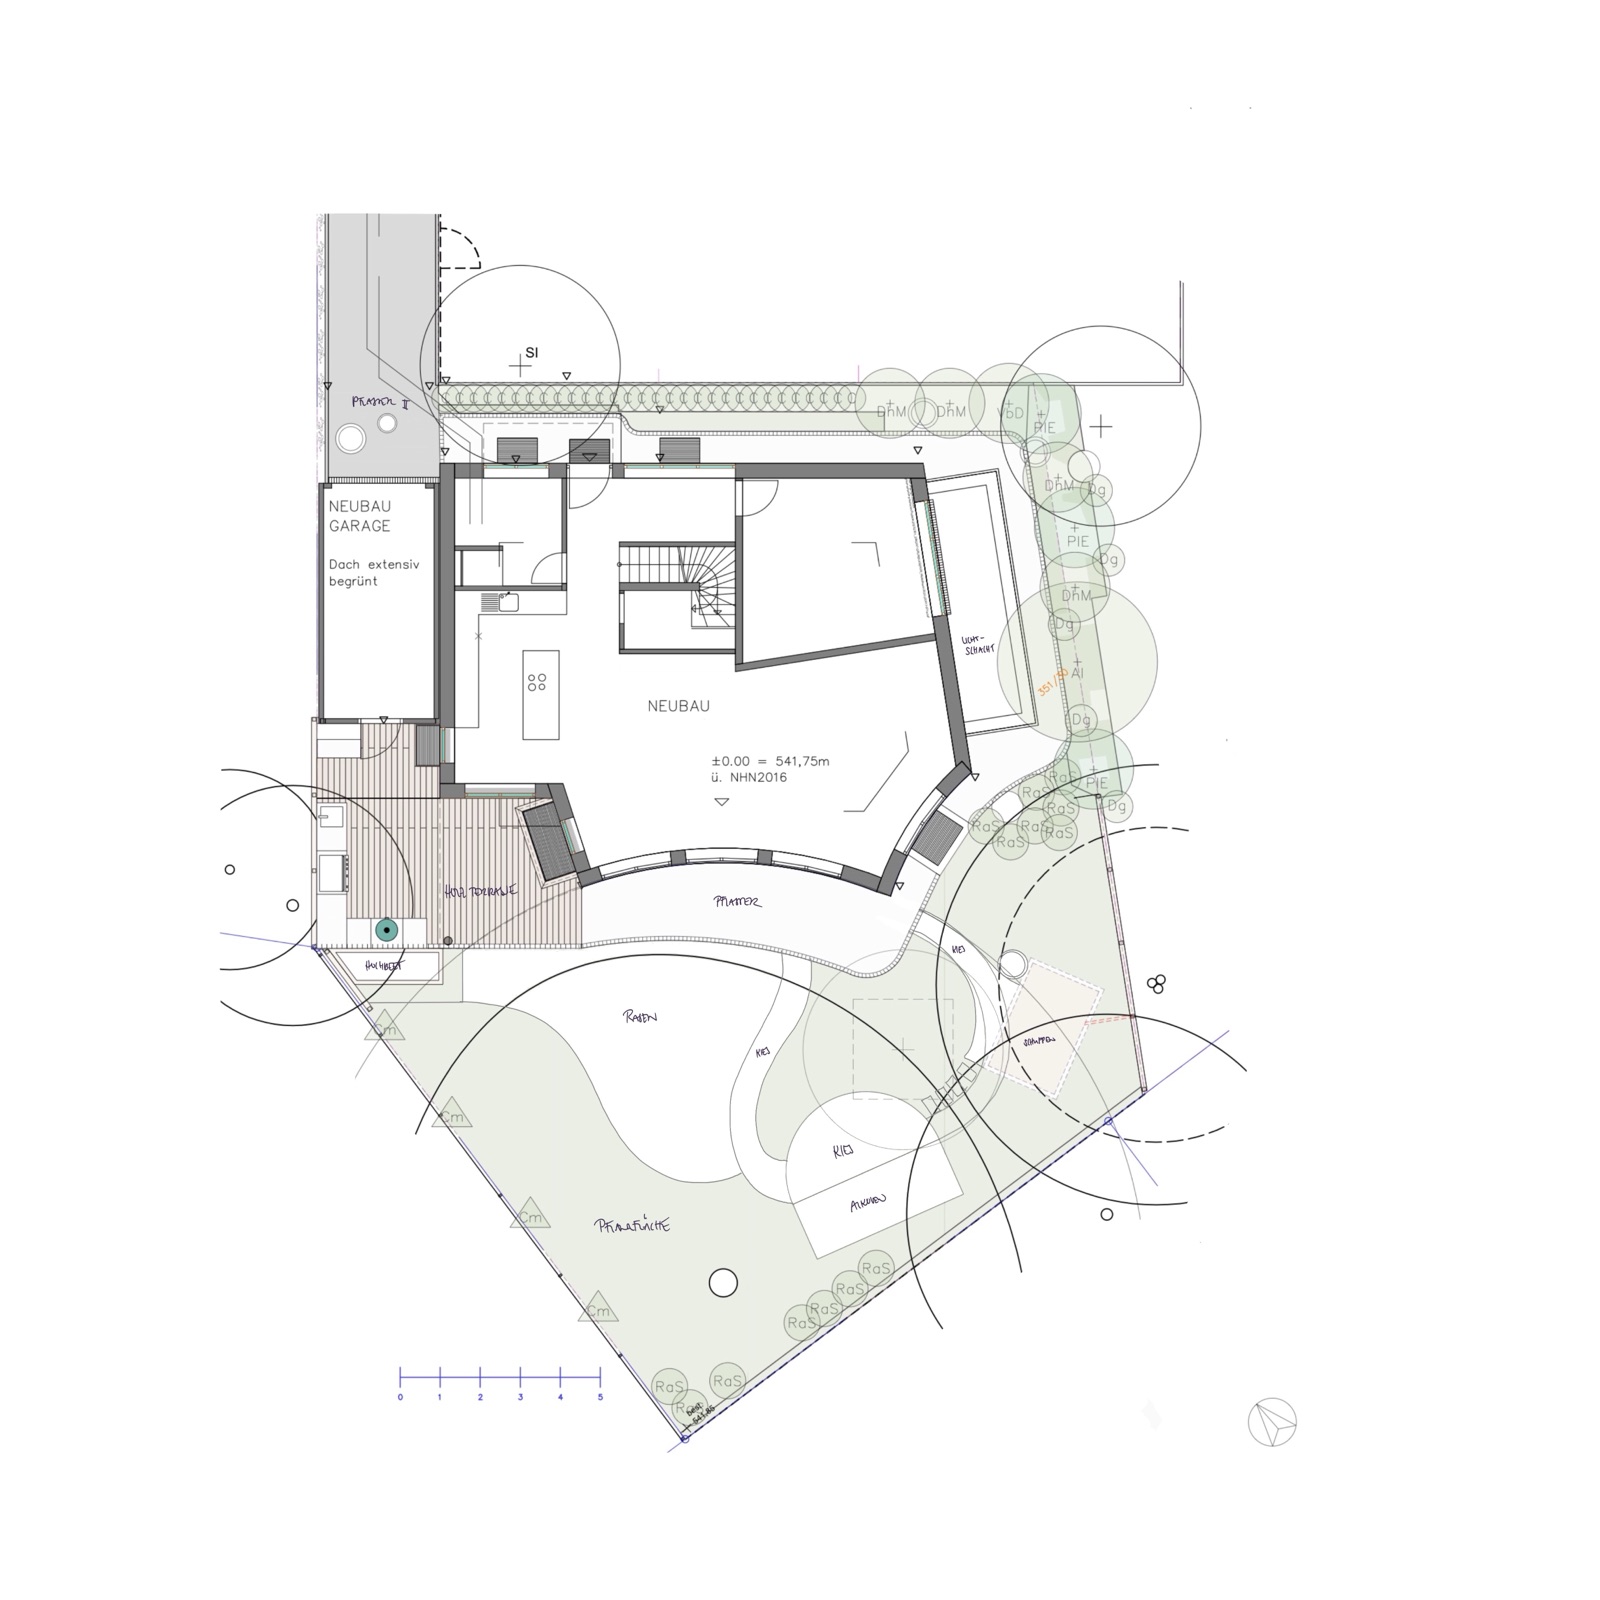
A suitable reference plan is the foundation of every illustration. This can be a CAD-exported design plan, a digital plan base, or a clean scan or sharp photograph of a hand sketch.
What matters is that the plan is internally to-scale, undistorted and easy to read. It doesn't yet need to be in the final target scale — Procreate will let you scale it using a scale reference.
The key design information should be clearly recognisable — for example buildings, paths, planted areas, paved surfaces, furniture and central design lines. Only then can the individual zones be cleanly translated into the illustration later on.
Scale reference in the plan
The plan should also include a scale reference — a scale bar (e.g. 1 m, 5 m or 10 m) or a clearly defined object of known length. The larger and more unambiguous this reference, the more precisely the plan can be scaled in Procreate later.
No CAD export?
Photograph or scan your hand sketch cleanly — that works well as long as the plan is undistorted and a scale reference is present. Add one before importing if needed: a single line of known length, e.g. 1 m, is enough.
Chapter 03Installation Guide
03
One-time setup — then ready
Installation Guide.
Install the brush set, colour palette and templates in a few steps — after that, your PlanKit is ready to go in Procreate.
Your PlanKit contains four files with different functions.
01 — Brush library
.brushlibraryAP LandSketch.brushlibrary The complete brush set with all 6 sets and every brush, stamp and pattern. Imports directly into Procreate.
02 — Colour palette
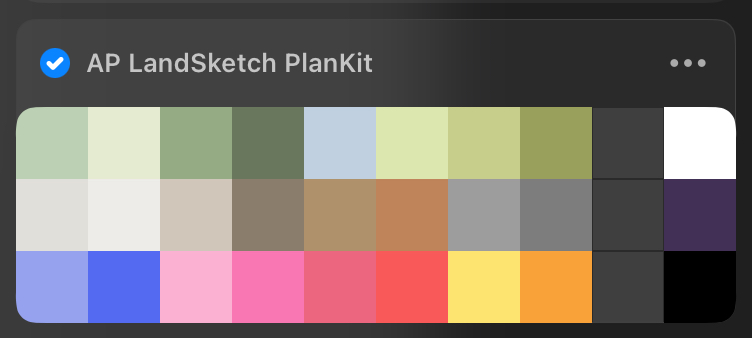
.swatchesAP_LandSketch.swatches The matching colour palette — every design colour at a tap. Imports directly into the Procreate colour panel.
03 & 04 — Master canvases
Canvas A4 & A3AP_LandSketch_Canvas_A4.procreate & AP_LandSketch_Canvas_A3.procreate Two prepared Procreate files — A4 and A3, 300 dpi each, with a preset 2D grid (10 mm) and an example master layer structure to get you started. Ready to use as a starting file. The available number of layers depends on hardware and varies with canvas size and iPad model.*
05 — User guide
.pdfAP LandSketch PlanKit User Guide.pdf A printable reference for installing all files, on your computer or directly on the iPad.
* Example values, iPad Pro 1st generation (A1584): A4 @ 300 dpi → 57 layers · A3 @ 300 dpi → 26 layers. Newer models typically have more layers available.
Canvas size & available layers
The smaller the canvas, the more layers Procreate makes available — and vice versa. When in doubt, start with the A3 template and after scaling, check whether the canvas can still be cropped.
The 2D grid drawing guide is already preset in both templates to 10 mm.
Installation from desktop
How to transfer the files to your iPad
Unzip the downloaded folder on your computer — using your standard archive tool (macOS: double-click; Windows: right-click → Extract All).
From a Mac (macOS 10.11 or newer): Transfer all four files via AirDrop or via iCloud Drive to your iPad. On the iPad: in the Files app, tap on each file → [ … ] → "Open in Procreate".
From Windows: Upload the files to a cloud service (e.g. iCloud Drive, Dropbox, OneDrive). On the iPad open the Files app, navigate to each file, tap [ … ] → Share → Open in Procreate. Repeat for each file.
Open Procreate. The brushes appear automatically at the top of the Brush Library. The swatches are in the colour panel under Palettes. The canvas files appear in the Procreate gallery.
Important: importing brushes
Do not use the import function inside the brush panel (the "+" at the top right of the Brush Library) — that's only for individual .brush files. The .brushlibrary file must be opened directly via the Files app or AirDrop into Procreate.
Installation directly on the iPad
You'll need an unzipping app — install ZipApp (the free version is enough) or a similar app from the App Store.
Download your purchase from your shop account. When the download window appears: "Open in …" → ZipApp. Tap the ZIP file → Yes.
After unzipping, you'll find the four files in the Files app under On my iPad. Navigate to the first file, tap Select, choose it, tap Share (bottom left) → Open in Procreate. Repeat for each of the four files.
Open Procreate — brushes, swatches and canvases are immediately available.
Package contents — AP LandSketch PlanKit
File
Format
Destination in Procreate
AP LandSketch PlanKit
.brushlibrary
Brush Library
AP LandSketch
.swatches
Paletten
AP_LandSketch_Canvas_A4
.procreate
Galerie*
AP_LandSketch_Canvas_A3
.procreate
Galerie*
AP LandSketch PlanKit User Guide
.pdf
Reference
Chapter 04Scale & Setup
04
Preparation
How the set is meant to work.
The set works with predefined size markers. For them to land at the right diameter on the slider, you need a clear setup — a few minutes of work.
AP LandSketch PlanKitUser Guide · V1
04 — Scale & SetupPreparation
Resolution
300 dpiNo compromise, if you plan to print.
Scale
1 : 100The primary scale the set is designed for.
Format
A3 or largerThe recommended canvas for most private gardens.
Grid
10 mm2D grid, set grid size to 10 mm = 1 m in the plan at 1:100.
Brush sizes: how the set is intended
Many brushes and stamps come with predefined size markers on the slider. These markers are designed for the recommended setup (300 dpi · 1:100) and help you hit the "right" size quickly — for example Trees WO1 ⌀ 8 m or Shrubs M ⌀ 1.5 m.
Set up the drawing guide
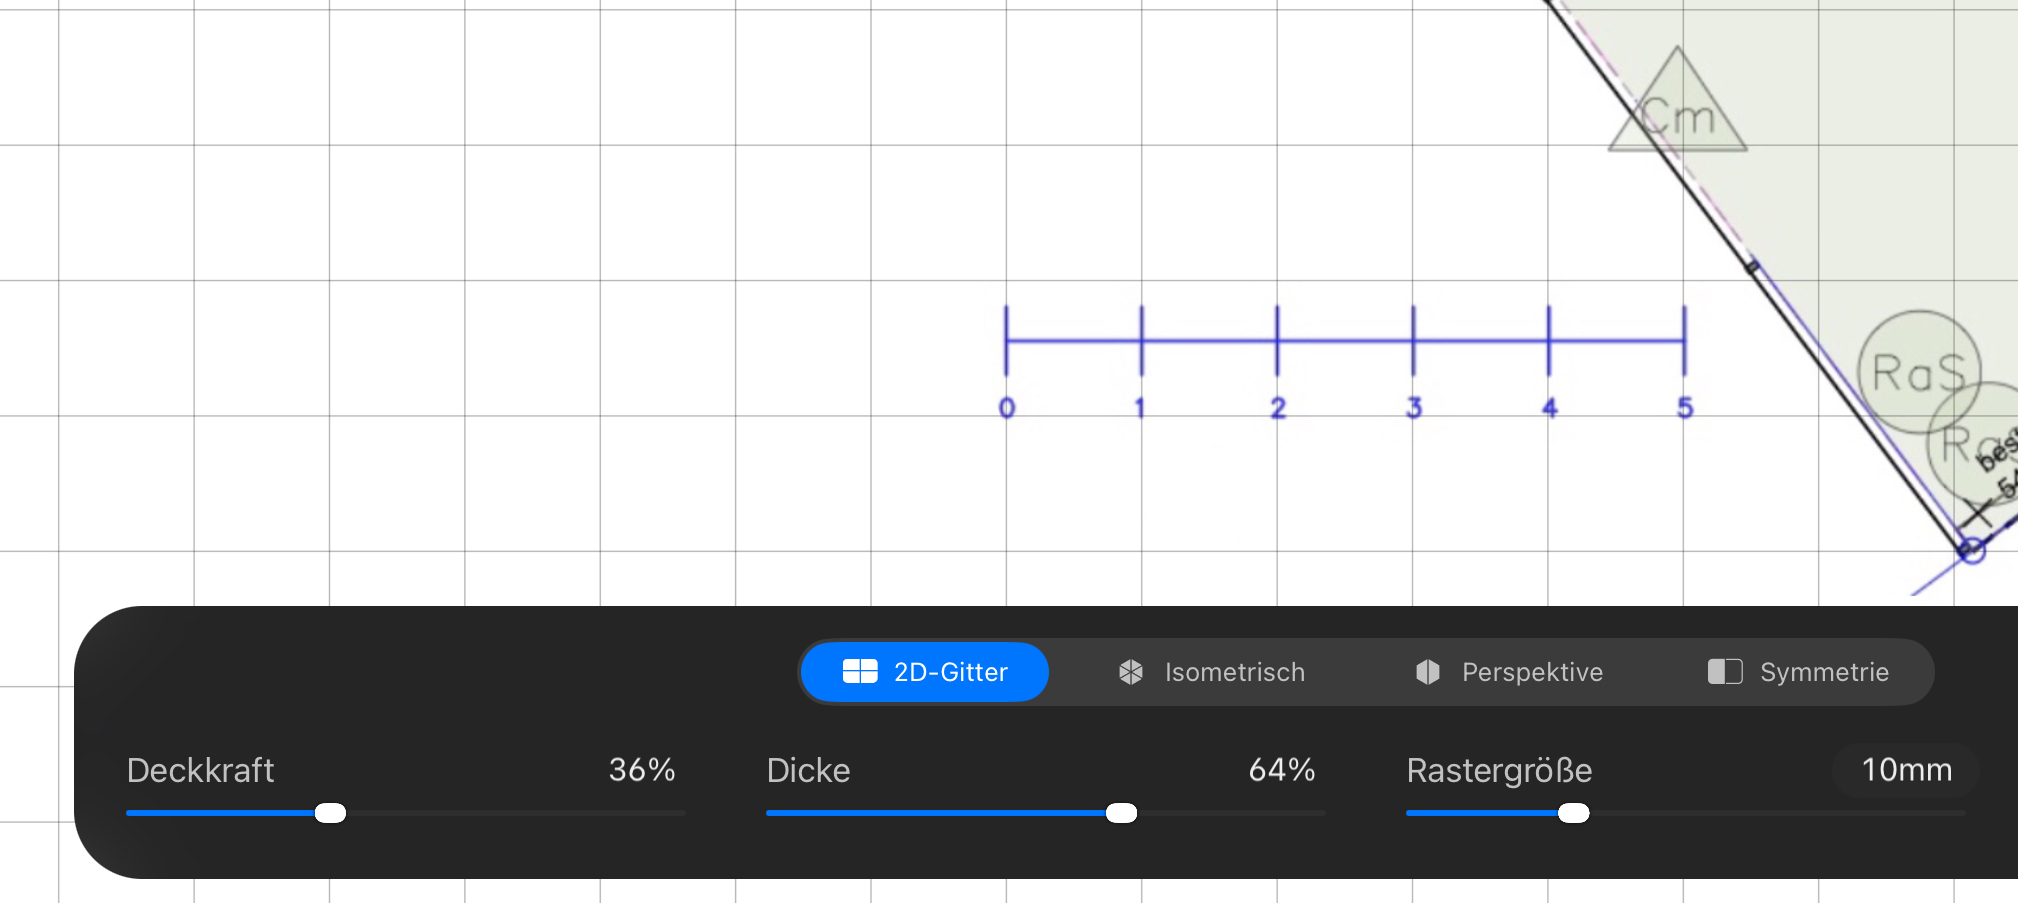
In Procreate, tap Actions (wrench) → Canvas → Edit Drawing Guide.
Choose the 2D Grid tab and set Grid Size to 10 mm. Opacity & thickness to taste.
Import the reference plan (PDF / JPG) as the first/bottom layer.
Resize so that the 1-metre reference matches exactly one grid cell (10 mm / 1 cm).
Reduce the opacity of the reference layer to 30–50 % and lock the layer. Drawing can now begin.
Tip on the set structure
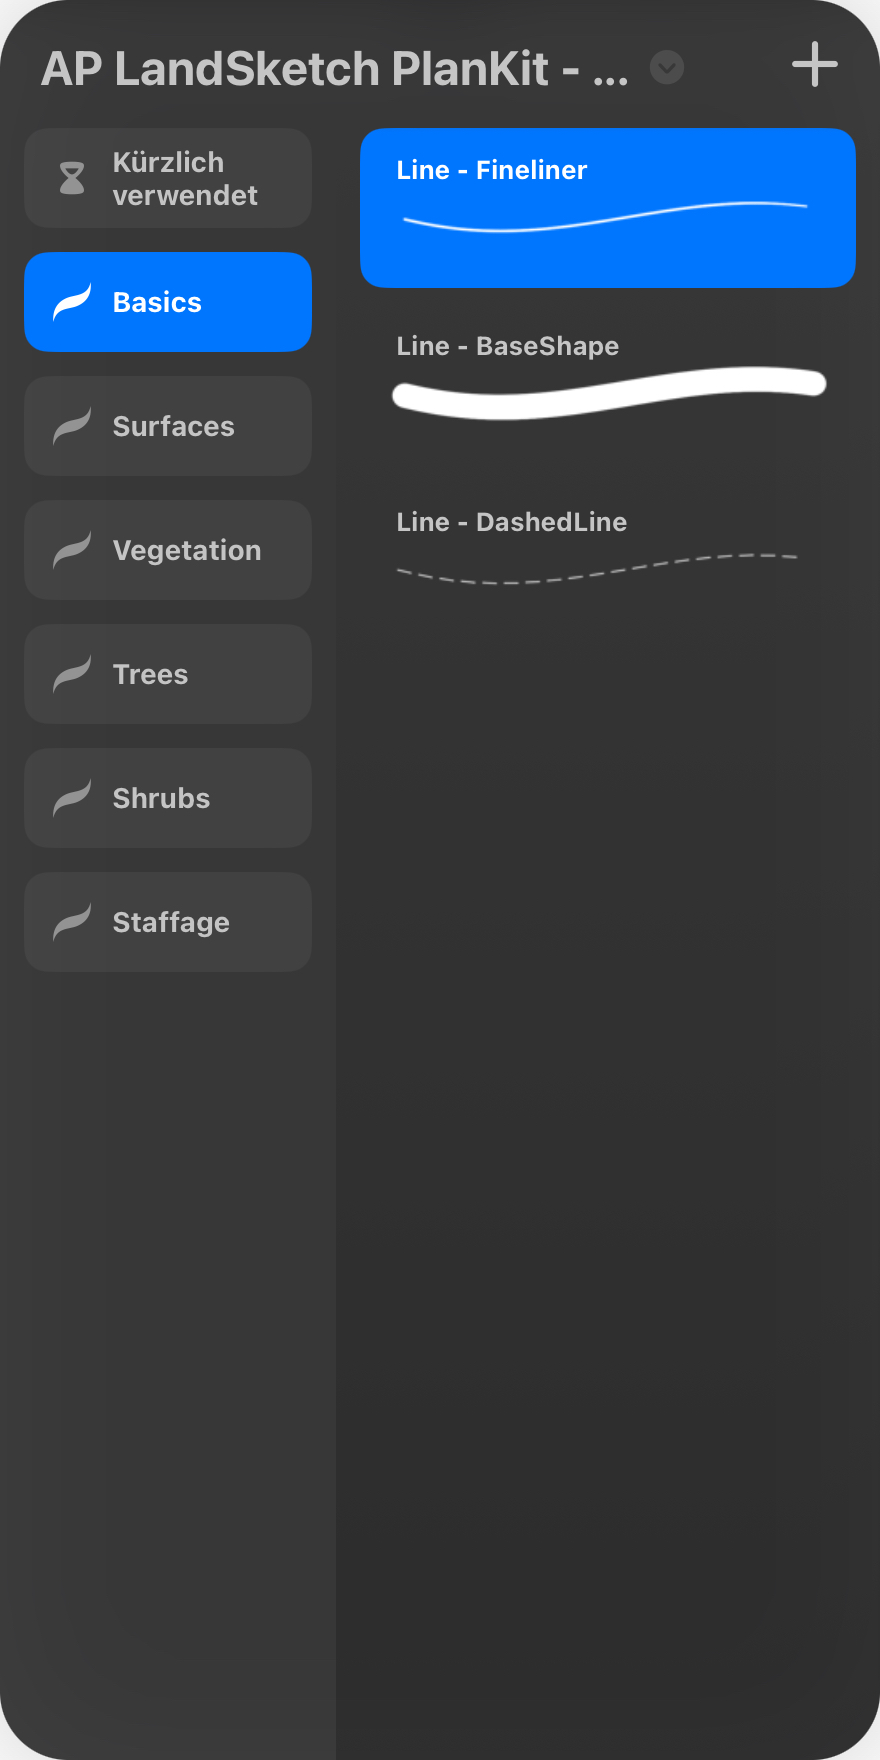
The brush set is organised into six folders. The order in the workflow: first the linework (Fineliner) for buildings, planted areas and paved surfaces with Basics, then lay in the colour fields (BaseShape) (as a base for clipping masks), then the details with Vegetation / Surfaces, then stamp trees and shrubs with Trees / Shrubs, then the furniture with Staffage — and shadows right at the end.
Set 01
Basics
Linework — Fineliner, BaseShape, dashed lines.
3 BRUSHES
Set 02
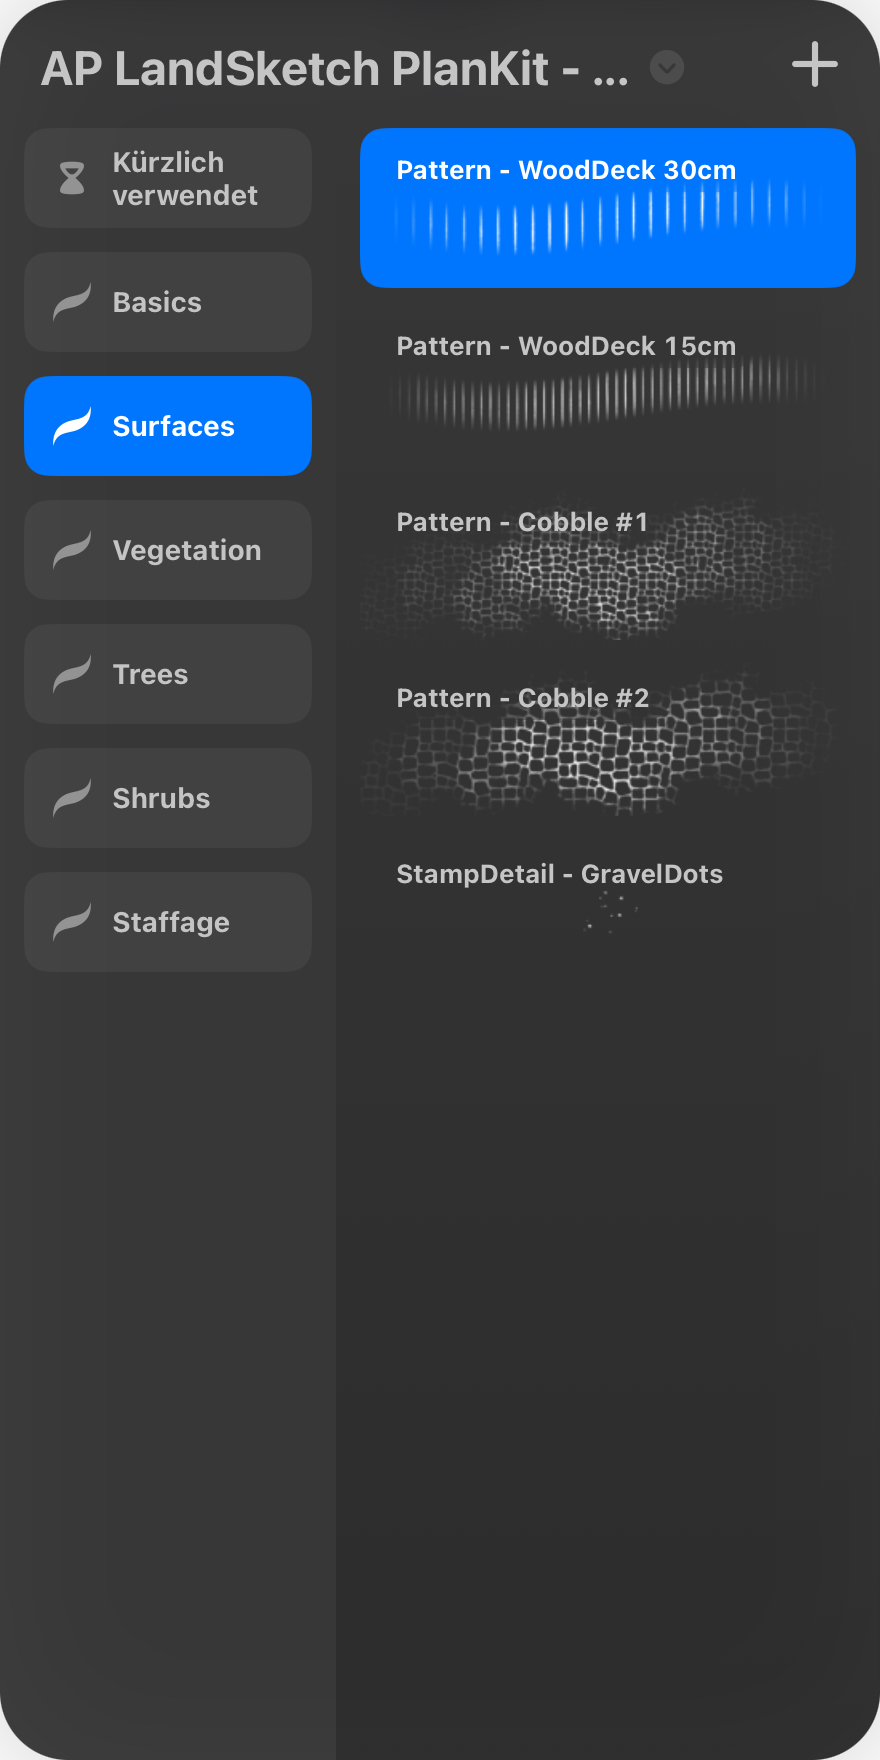
Surfaces
Wooden decking (15 cm + 30 cm plank width), cobblestone (2 sizes), gravel.
Three growth orders, three crown shapes each. Some with an extra fill stamp for open-line crowns.
~24 STAMPS
Set 05
Shrubs
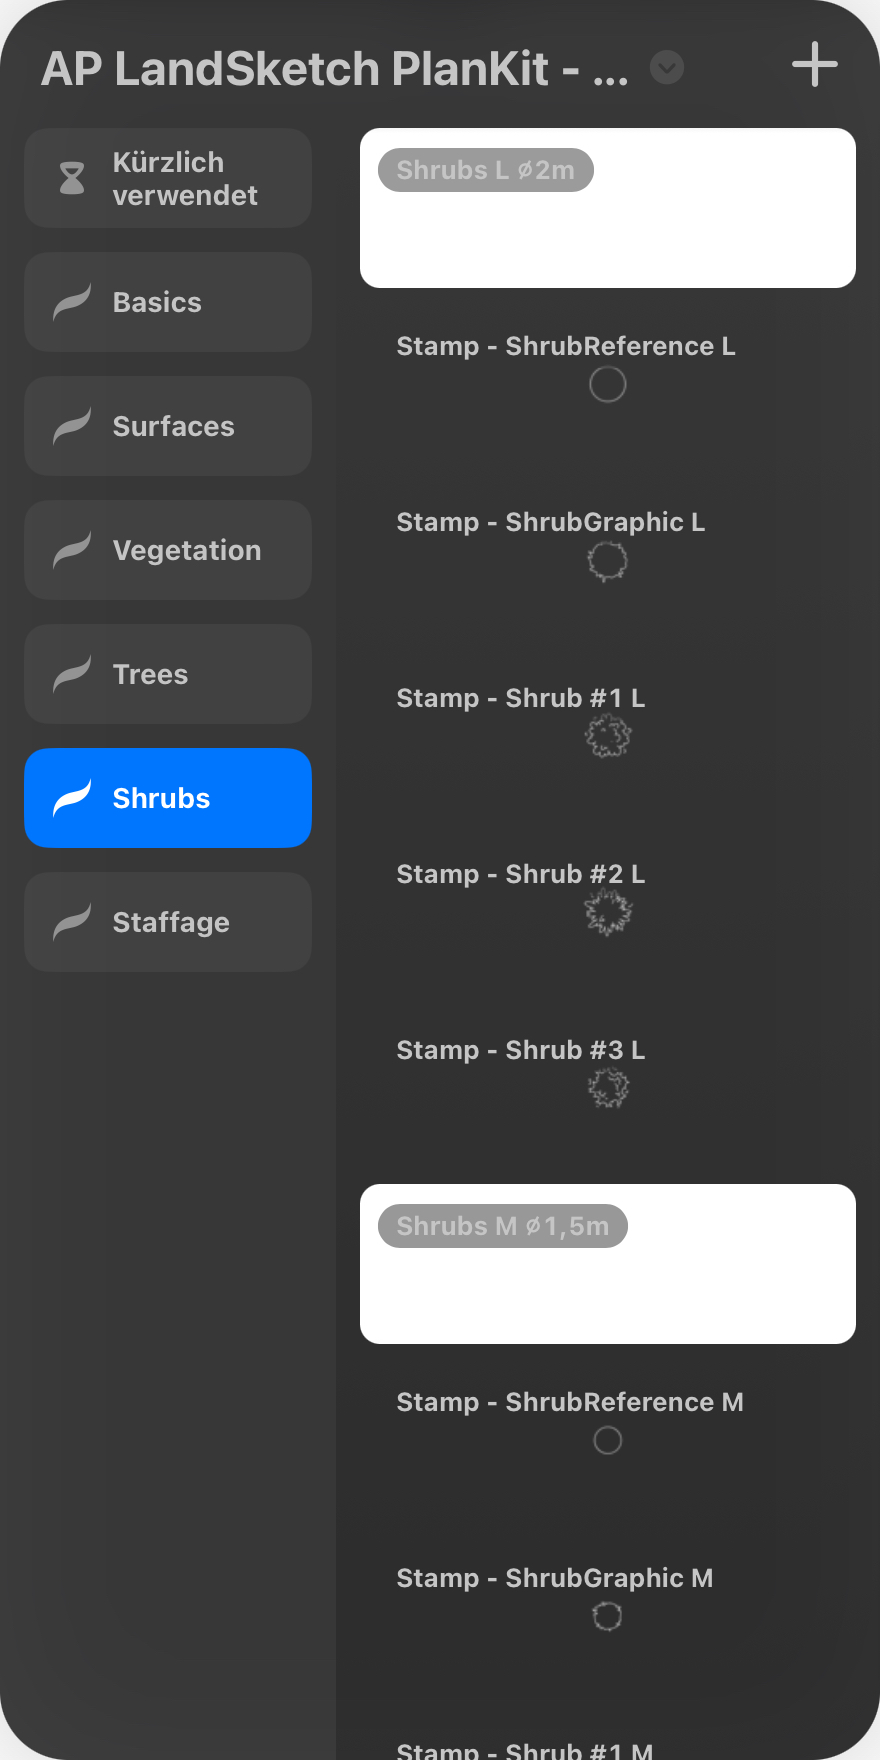
Three sizes — L (⌀ 2 m), M (⌀ 1.5 m), S (⌀ 1 m).
15 STAMPS
Set 06
Staffage
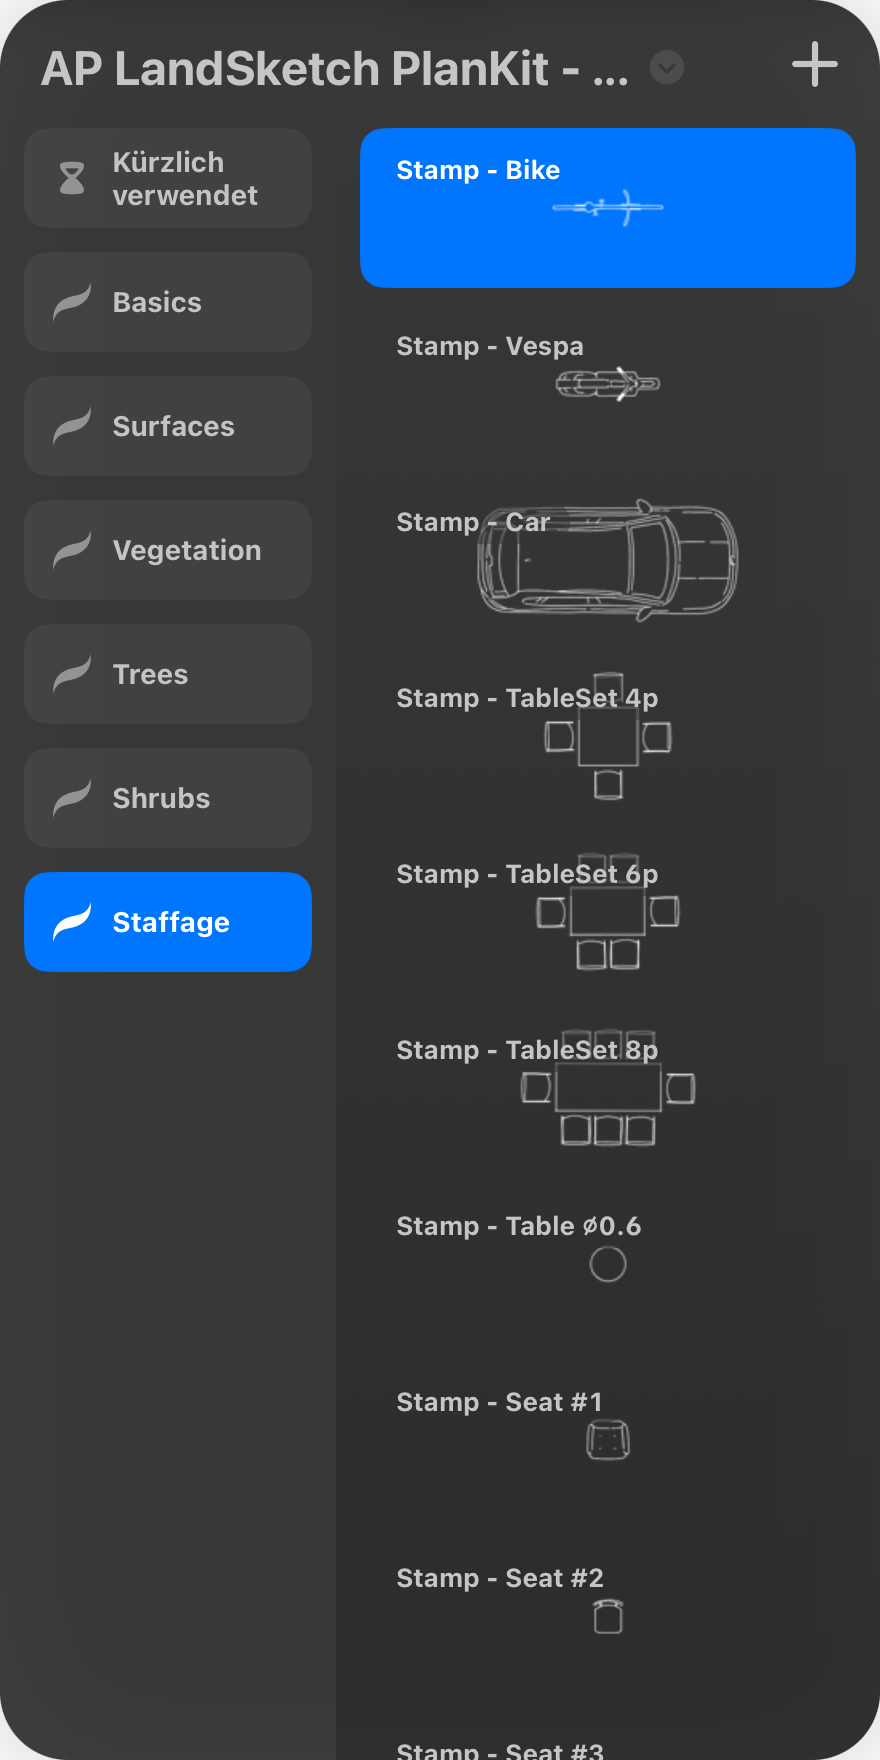
Furniture and outdoor elements, vehicles, scale bar, north arrow.
20+ STAMPS
Chapter 05Workflow
05
From reference plan to finished plan
In five steps.
The sequence is always the same. Once you've done it once, it sticks.
AP LandSketch PlanKitUser Guide · V1
05 — WorkflowFive steps
01
Import reference plan
Load the file, scale it, lock it.
02
Draw linework
From the big picture into the detail.
03
Lay in surfaces
Define base areas cleanly.
04
Detail surfaces
Textures, blossoms, inner structures.
05
Set shadows
Right at the end.
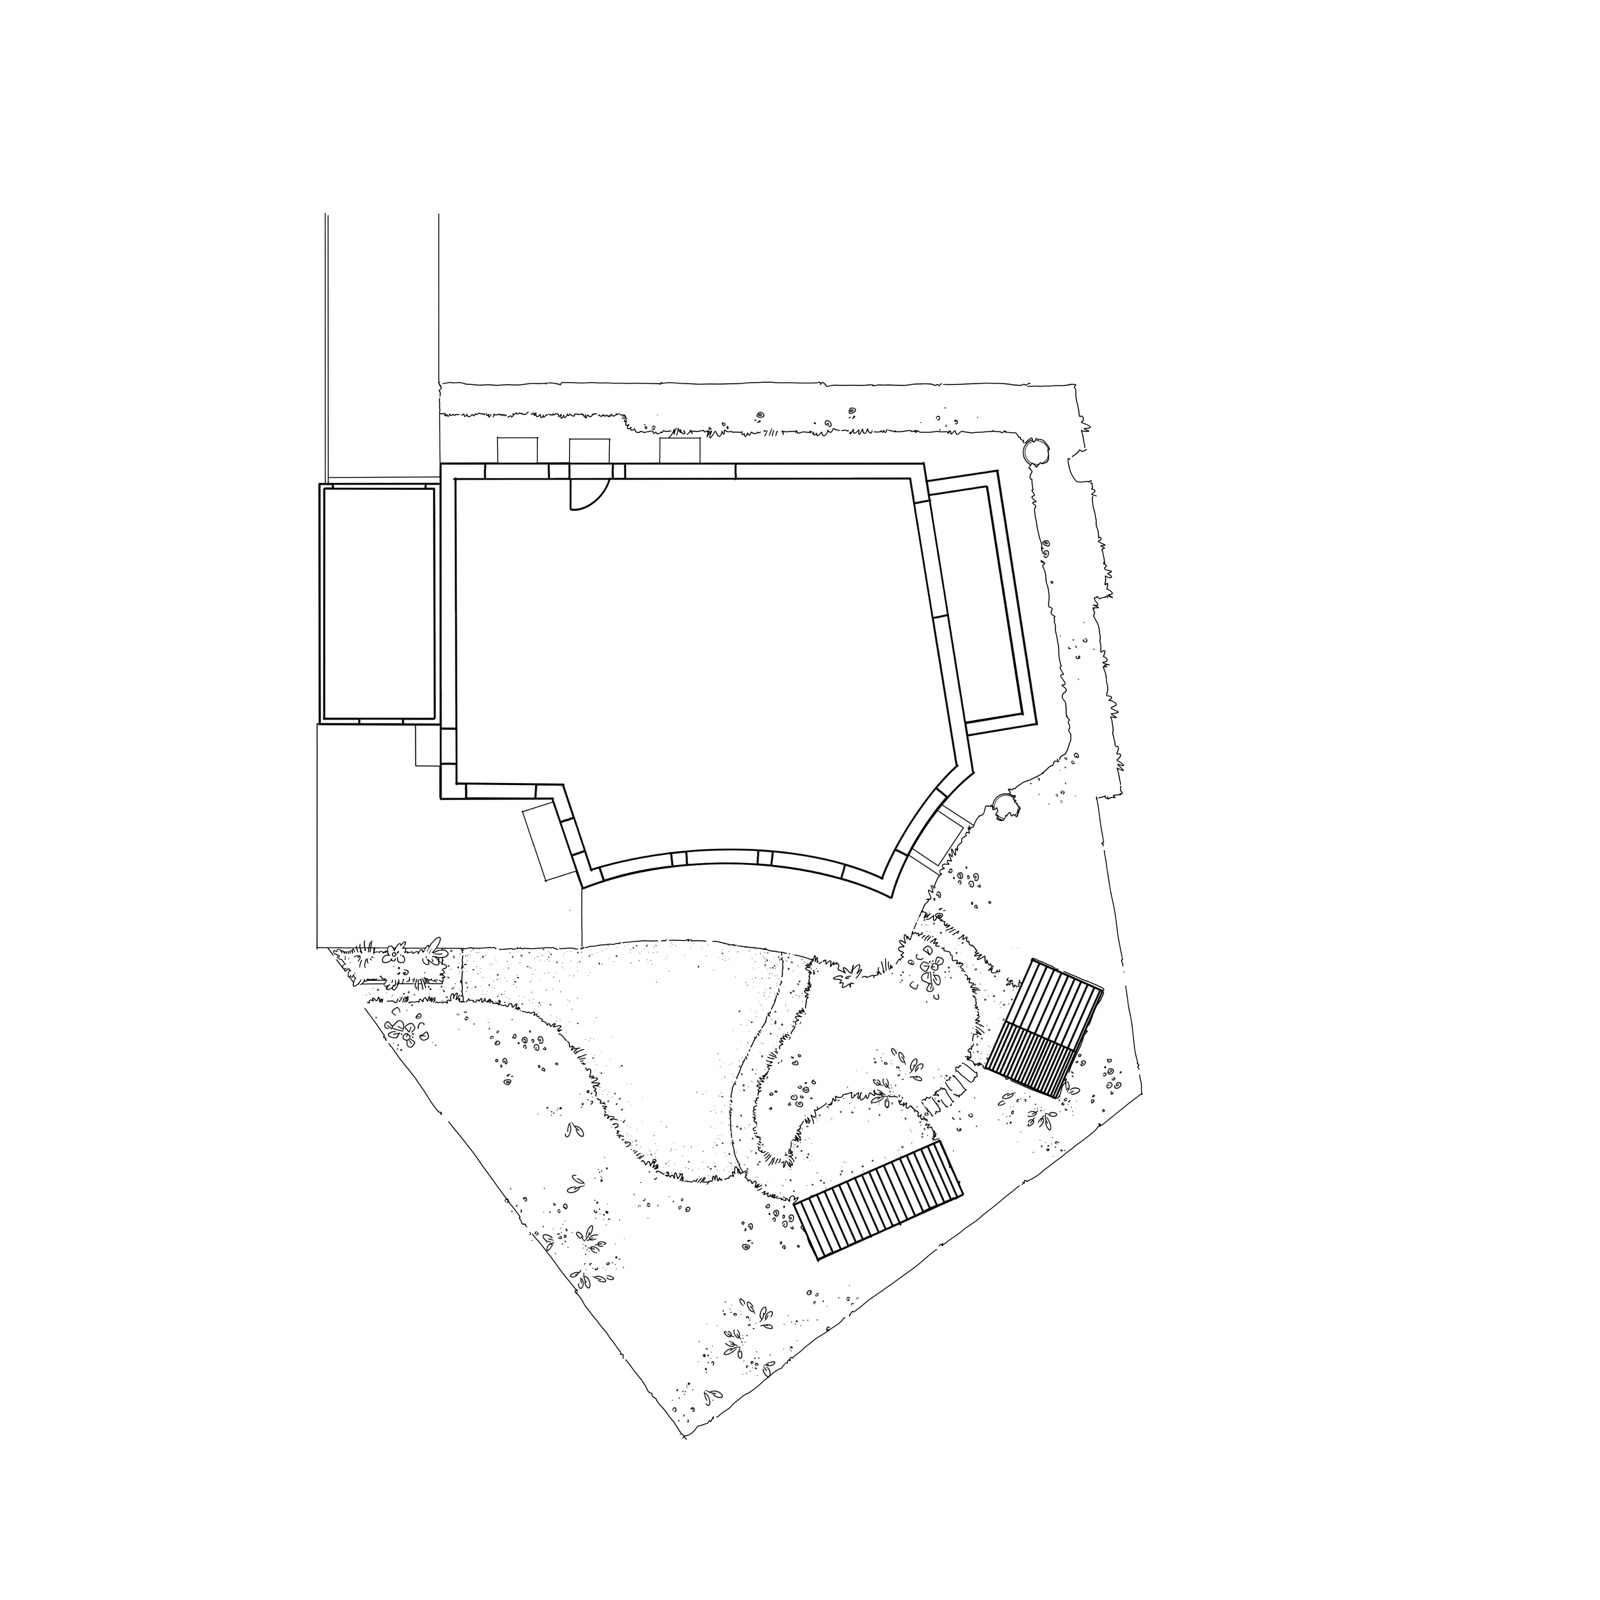
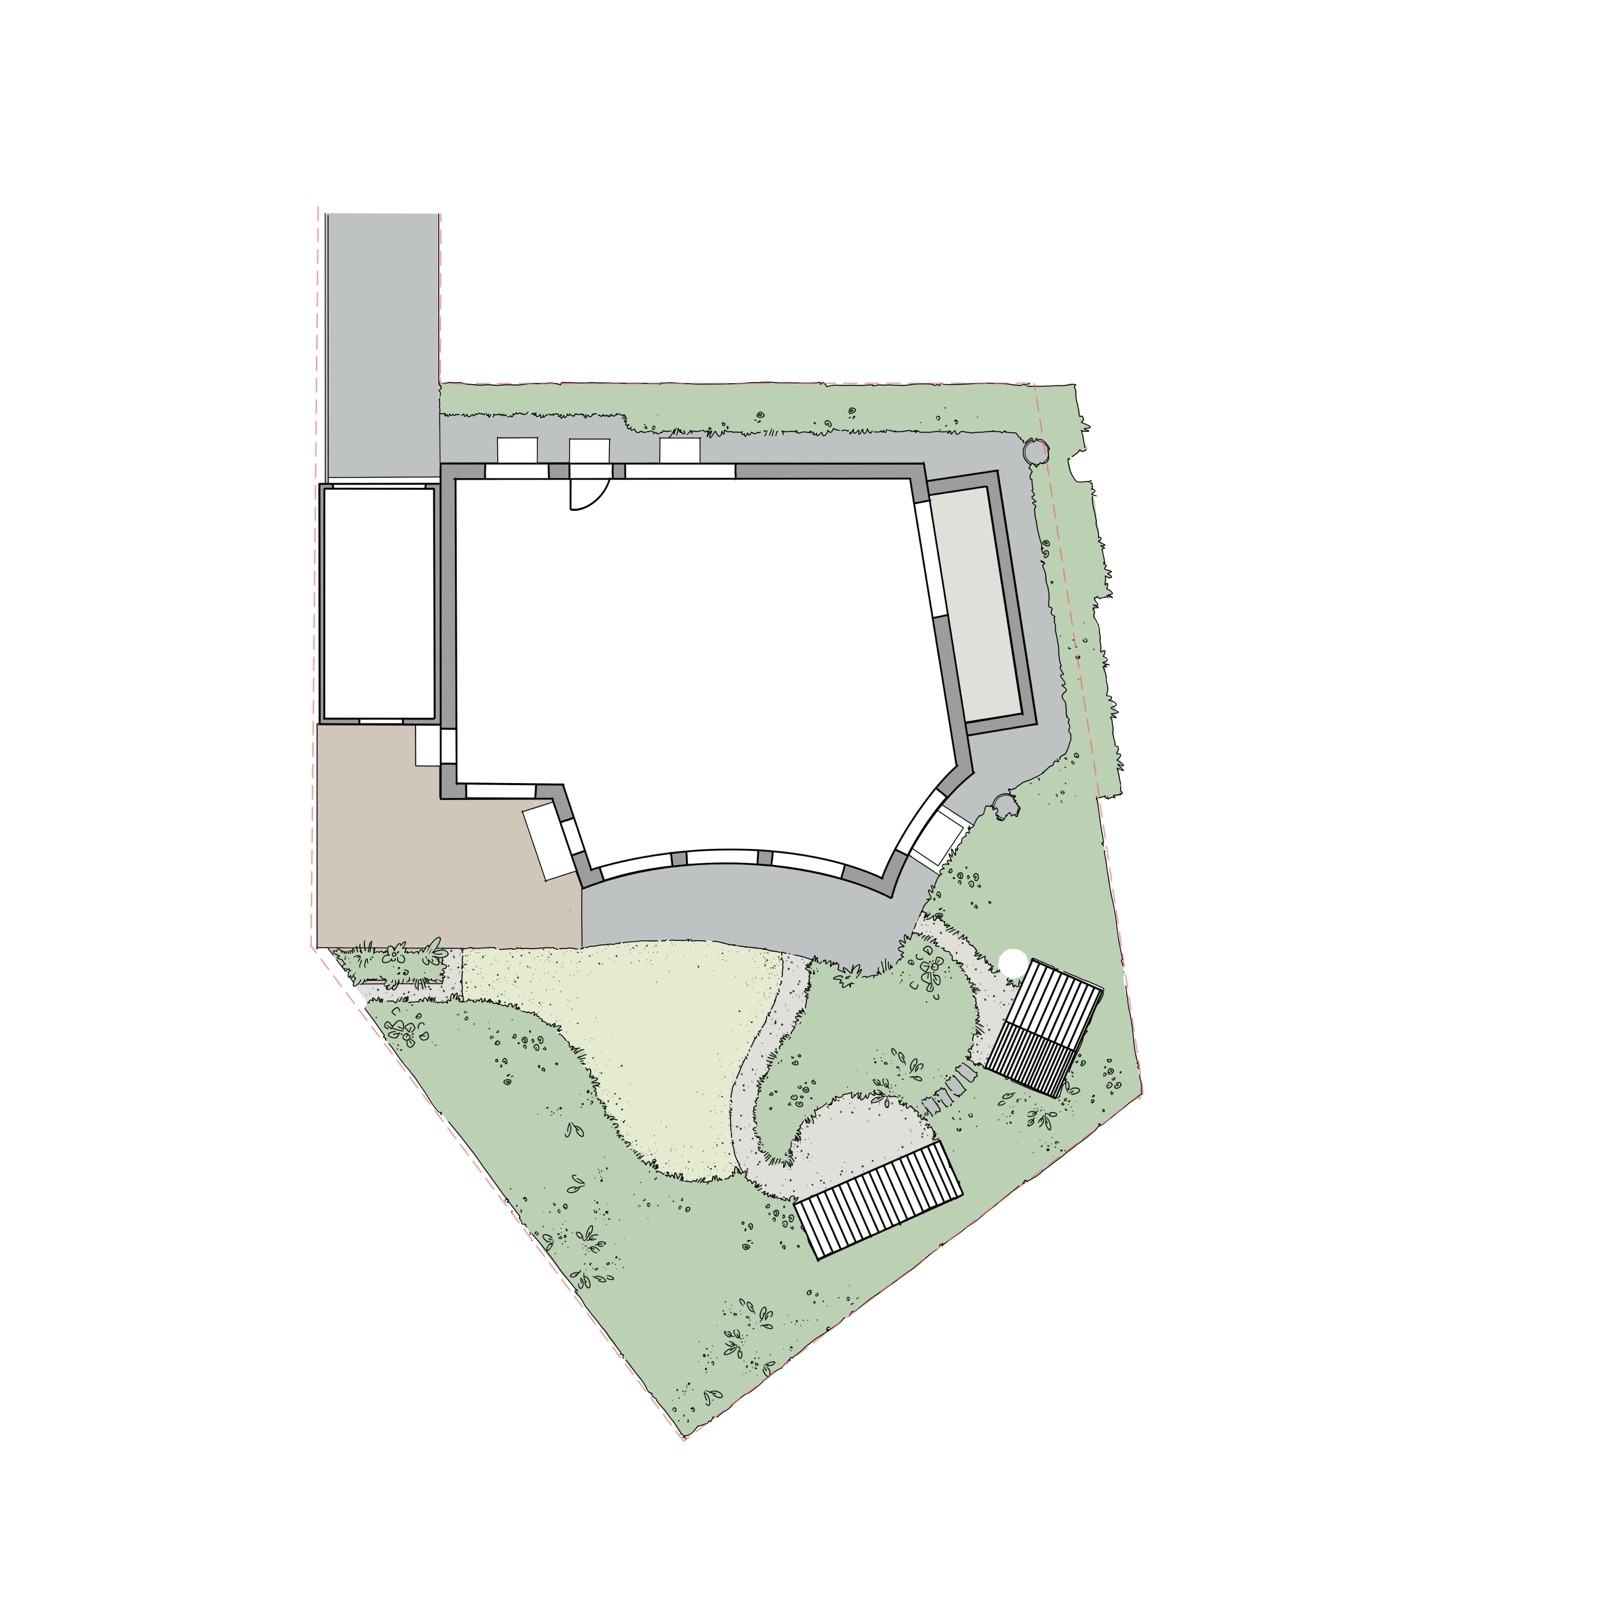
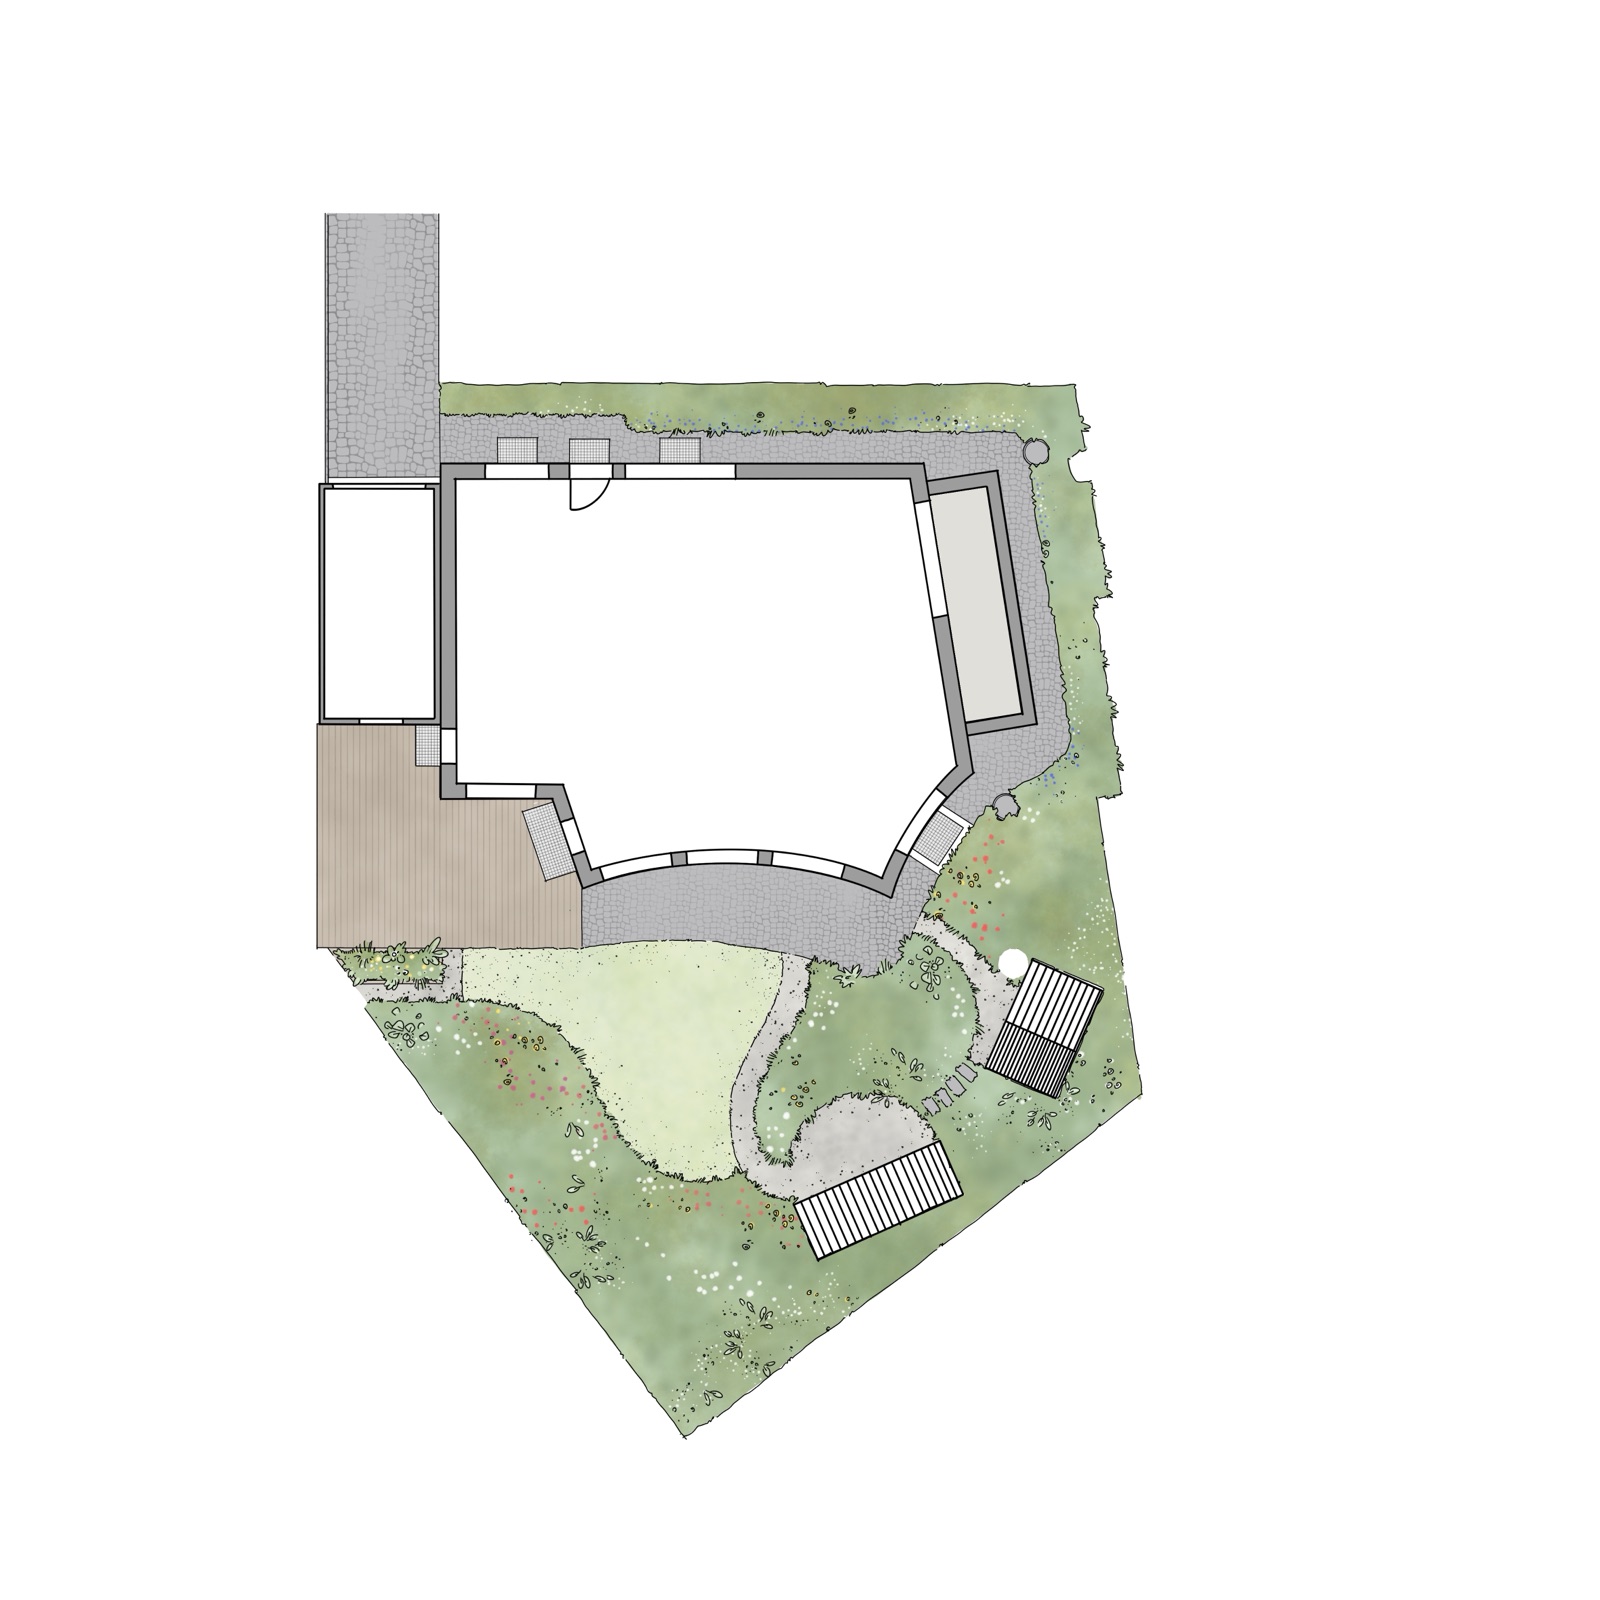
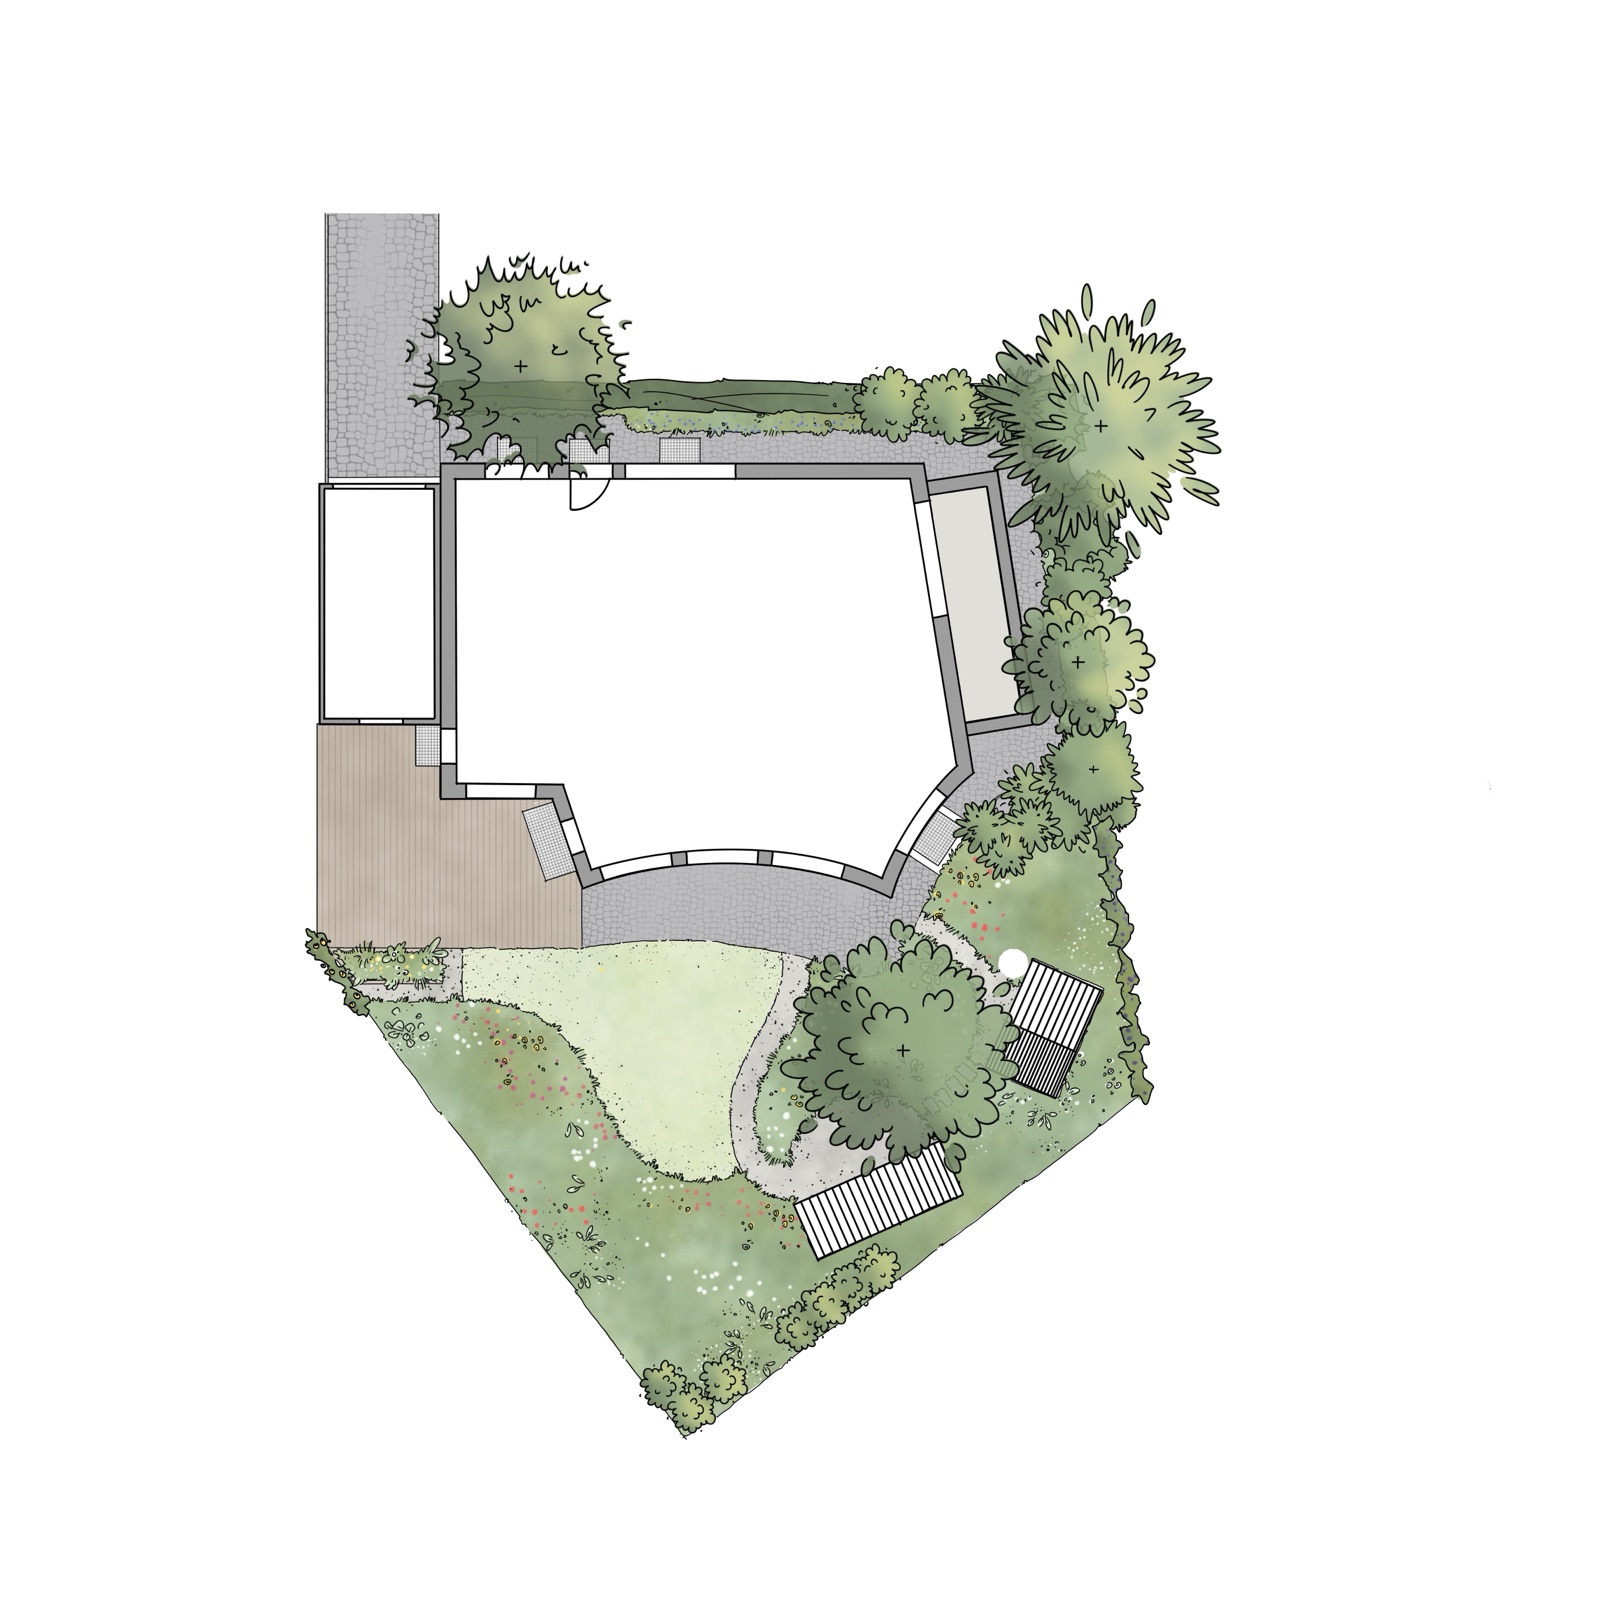
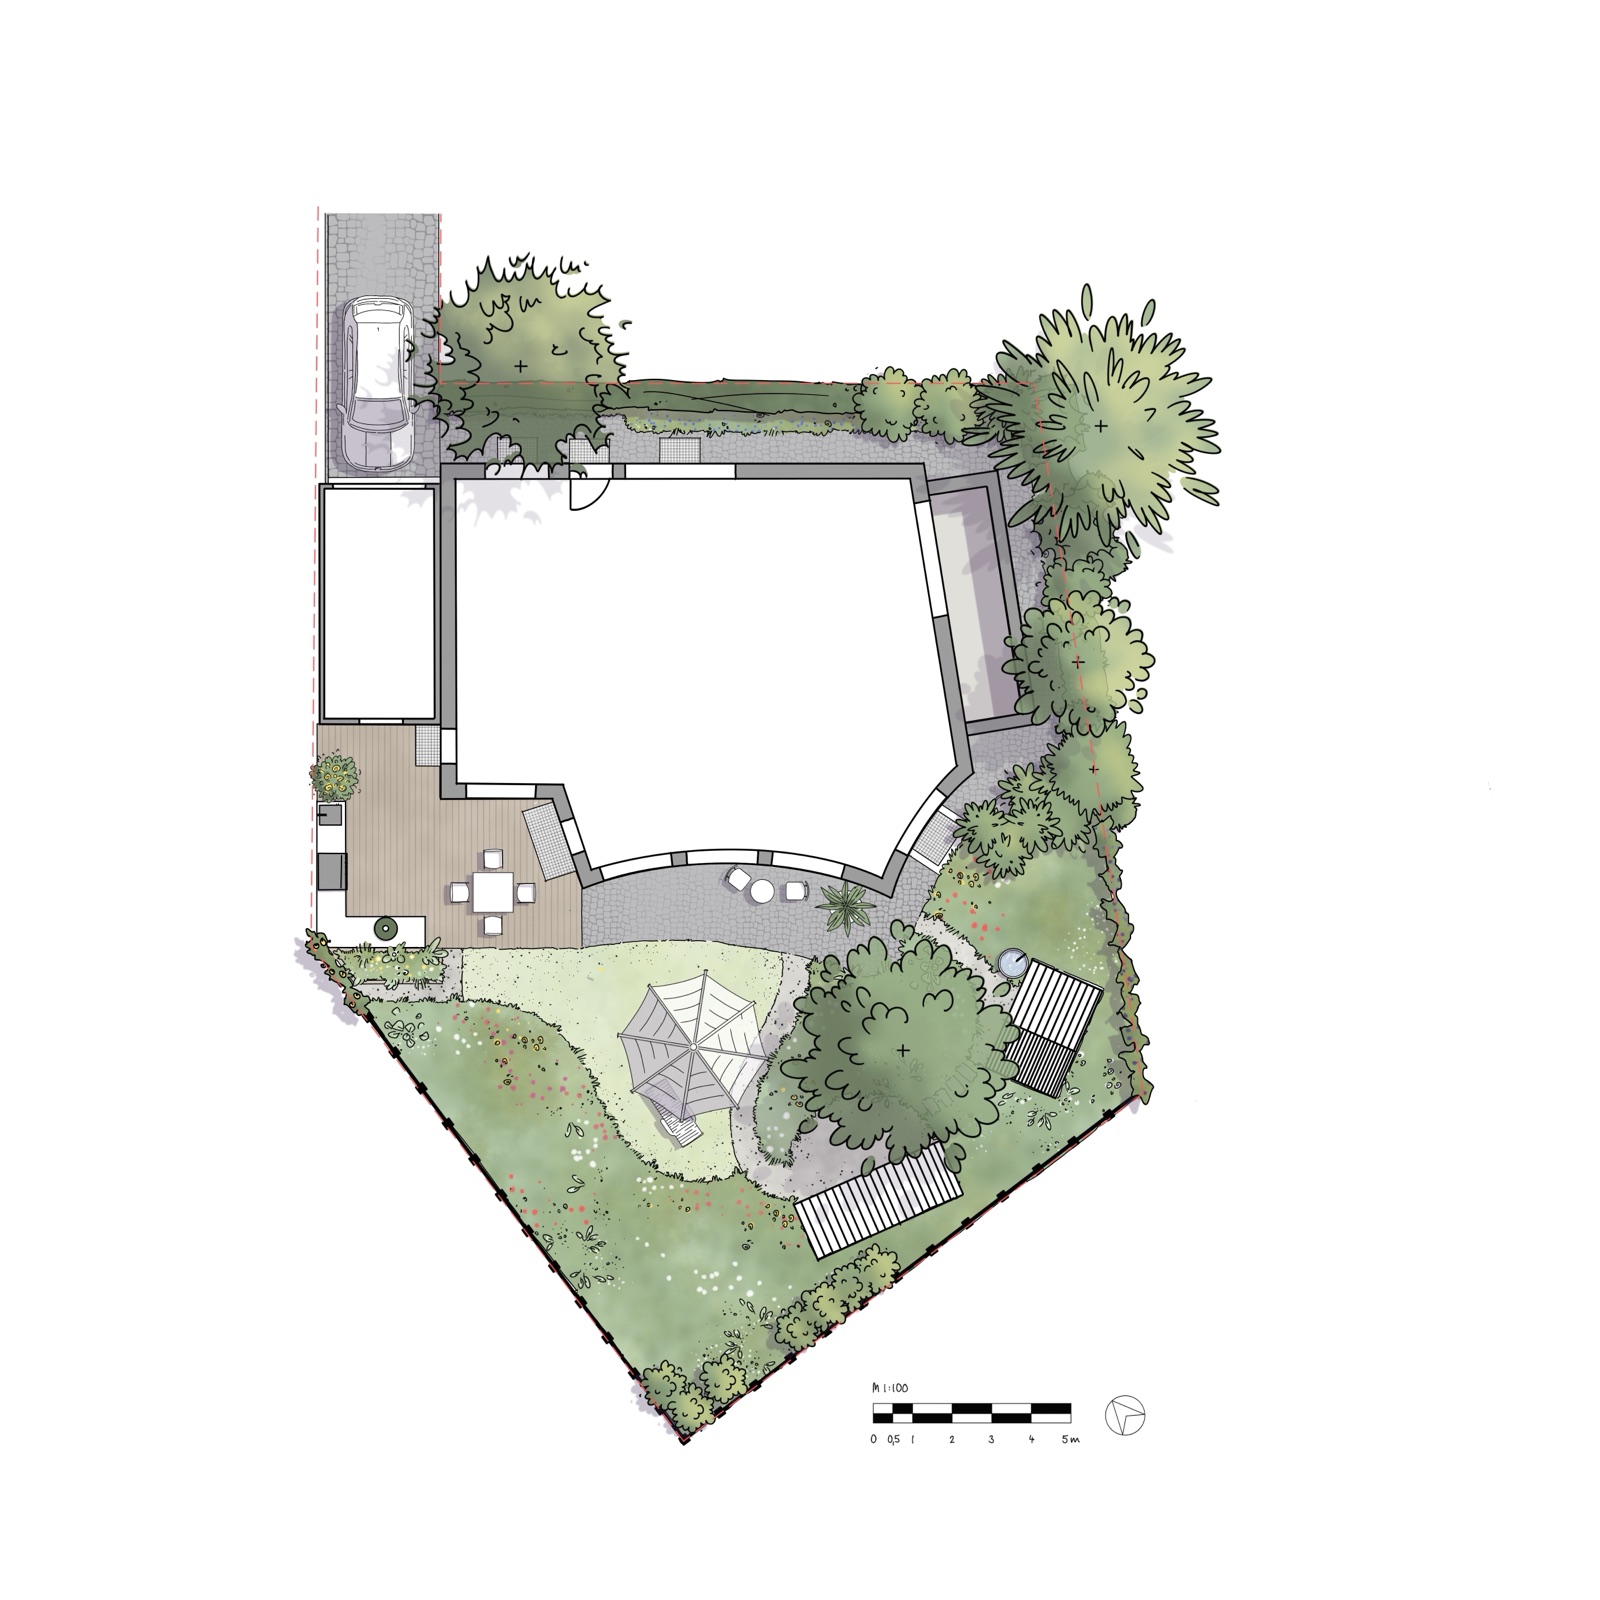
Six stages in pictures
00CAD reference01Linework02Surfaces03Surface textures & details04Trees & staffage05Finished with shadows & final details
01 — Import the reference plan
Open Procreate, create a new file (e.g. A3 / 300 dpi).
Import the reference plan as the bottom layer.
Activate the drawing guide (see Chapter 03) and scale the plan to the 1-metre reference.
Reduce the reference layer opacity to 30–50 % and lock it.
02 — Draw the linework
You work from the important into the detail. All lines are drawn with Basics → Line – Fineliner; line weight is controlled by the slider. The percentages are guidelines, not laws.
Element
Slider
Set
Architectural edges / buildings
100 / 70 %
Basics
Trees
100 %
Trees
Shrubs, hedges
70 %
Shrubs
Vegetation & paving surfaces
50 %
Vegetation
Staffage / furniture
30 %
Staffage
Fine details, hatching
30 %
Vegetation / Surfaces
03 — Lay in the surfaces
Principle: base areas are laid in cleanly first. Textures come later via clipping masks.
Define base areas with Basics → Line – BaseShape: close contours, fill with ColorDrop.
One layer per surface — lawn, planting, paving — a new layer per type.
Name layers clearly — you'll thank yourself in step 04.
04 — Detail the surfaces
Add a clipping mask above each base layer and place the structures there. That keeps the textures precisely within each surface — no pixel-trimming needed.
Alternative: selection instead of clipping mask
Instead of a clipping mask you can activate the base surface via the Selection menu — Procreate will automatically select all filled pixels on that layer. Then create a new empty layer and apply details inside the active selection. The structures stay neatly within the surface.
Planting areas: Vegetation → Fill – PlantMass #1 / #2
Planted areas: line details look best when placed selectively and irregularly — that creates a living, natural character rather than an even pattern.
Paving: paved surfaces gain liveliness when the hatching is denser towards the edges and dissolves slightly towards the centre.
It's worth trying out a few variants and picking the most convincing visual result.
05 — Shadows right at the end
Set shadows only once the illustration "stands" — linework, surfaces and details are finished.
Duplicate the fill layer of the shadow-casting object (trees, shrubs, staffage, building fill).
Place the duplicate below the original, with a clear name — e.g. "Trees-F_Shadow".
Recolour to a smoky purple or blue tone.
Nudge slightly in the desired direction — usually around 45°. Shadows from taller objects are nudged further than those from shorter ones.
Opacity to 20–30 %. Optional: a soft Gaussian blur (~2 %).
Recommendation
One shadow layer per object group: "Tree shadows", "Shrub shadows", "Staffage shadows". That keeps you flexible and lets you fine-tune precisely. If a layer contains objects at different heights, you can move individual shadows with the selection tool.
Chapter 06Layer order
06
Foundation
The right layer arrangement for a convincing plan structure.
A well-considered layer structure is the foundation for a clean, flexible plan that you can adjust at any time.
AP LandSketch PlanKitUser Guide · V1
06 — Layer orderFoundation
14
Trees-L
Linework
13
Trees-F
Fill
12
Trees-Sh
Shadow
11
Buildings-L
Linework
10
Buildings-F
Fill
09
Shrubs-L
Linework
08
Shrubs-F
Fill
07
Shrubs-Sh
Shadow
06
Furniture-L
Linework
05
Furniture-F
Fill
04
Furniture-Sh
Shadow
03
Planting-L
Linework
⌐
Planting details (clipping)
Detail
⌐
Blossoms (clipping)
Detail
⌐
Planting texture (clipping)
Texture
02
Planting-F
Fill
⌐
Lawn details (clipping)
Detail
⌐
Lawn texture (clipping)
Texture
01
Lawn-F
Fill
—
Reference plan (locked)
PDF / JPG
⌐ Clipping layers sit directly above their base surface and clip to the layer below.
Notes
This is one possible base structure — not a rule. The fill layers (-F) for trees, shrubs and furniture come from duplicating the stamped and drawn line layer (-L).
Procreate limits the number of layers based on canvas size. When it gets tight, after finishing, reduce your working layers down to one — for example a planting surface together with its working layers like planting details, blossoms and planting texture.
Shadows at the very end — created by duplicating the relevant fill (-F) layer, placed below the element that casts them.
In my own work, twice as many layers usually appear during the process — I merge them down later.
On the layer overview
The diagram on the left shows, by example, how I build up planted and lawn surfaces in practice — with additional clipping layers for textures, details and blossoms. It's not a standard, just an approach I use often.
Chapter 07Brush reference
07
Brush set in detail
What each brush does.
A complete overview of all six brush sets — with examples and tips for the plan build.
AP LandSketch PlanKitUser Guide · V1
07.01 — Brush referenceSet 01 · Basics
Set 01 · Basics
Basics
Linework — Fineliner, dashed lines, BaseShape.
Line — Fineliner
Main pen for all linework. Stroke width via the slider — see Chapter 04 for guideline values.
Line — BaseShape
Clean, opaque stroke for base surfaces. Close contours and fill with ColorDrop.
Line — DashedLine
Dashed line. For boundaries, sight lines, planned extensions.
07.02 — Brush referenceSet 02 · Surfaces
Set 02 · Surfaces
Surfaces
Paving textures — wooden decking, cobblestone, gravel. Applied via a clipping mask on top of the paved surface.
Colour choice for pattern brushes
For all pattern brushes, always use a darker colour than the base surface — only then does the texture come through cleanly and stand out against the underlying surface.
Pattern — WoodDeck 30 cm
Wooden decking, plank width 30 cm.
Pattern — WoodDeck 15 cm
Wooden decking, plank width 15 cm.
Pattern — Cobble #1
Cobblestone, small irregular pattern.
Pattern — Cobble #2
Cobblestone, large irregular pattern.
StampDetail — GravelDots
Gravel and path structure as fine dot scatter. Use the Fineliner colour.
07.03 — Brush referenceSet 03 · Vegetation
Set 03 · Vegetation
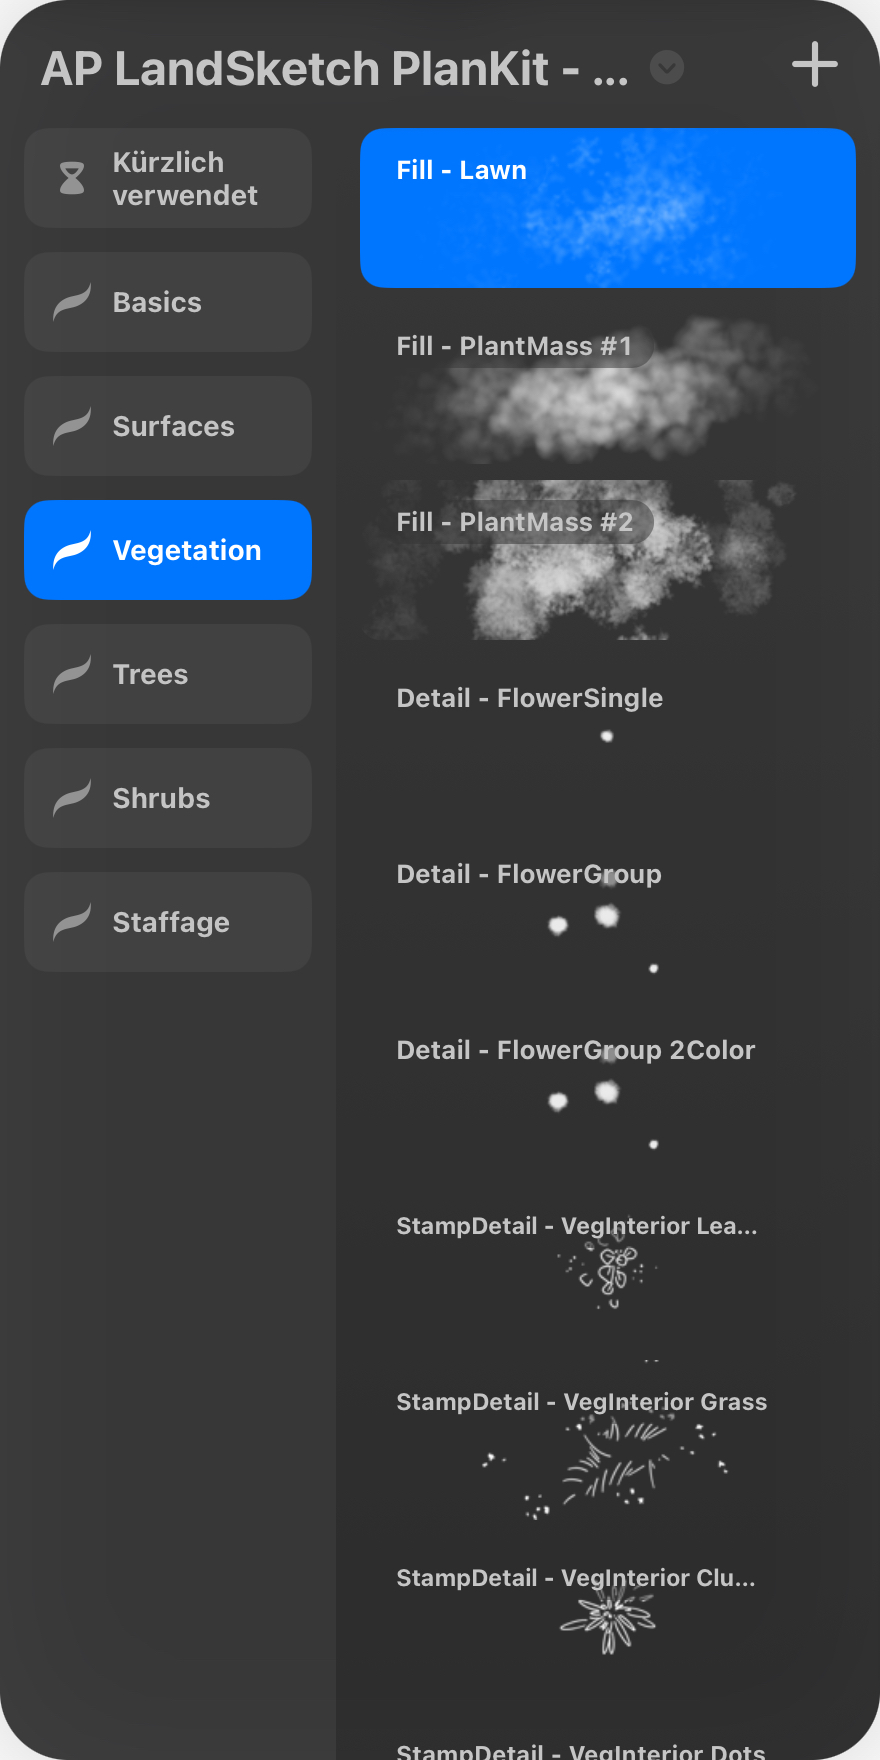
Vegetation
Planted and lawn surfaces, inner structures, blossoms.
Fill — Lawn
Lawn base structure. Applied via a clipping mask.
Fill — PlantMass #1 / #2
Planted areas — calm (#1) or more textured with colour variation (#2). Via clipping mask.
Detail — FlowerSingle / Group / 2Colour
Blossom flecks, single or in groups; 2Colour uses a secondary colour and varies with pressure.
For all StampDetail brushes, use the Fineliner colour — these are line details and work most harmoniously with the dark line colour.
07.04 — Brush referenceSet 04 · Trees
Set 04 · Trees · WO1 / WO2 / WO3
Trees
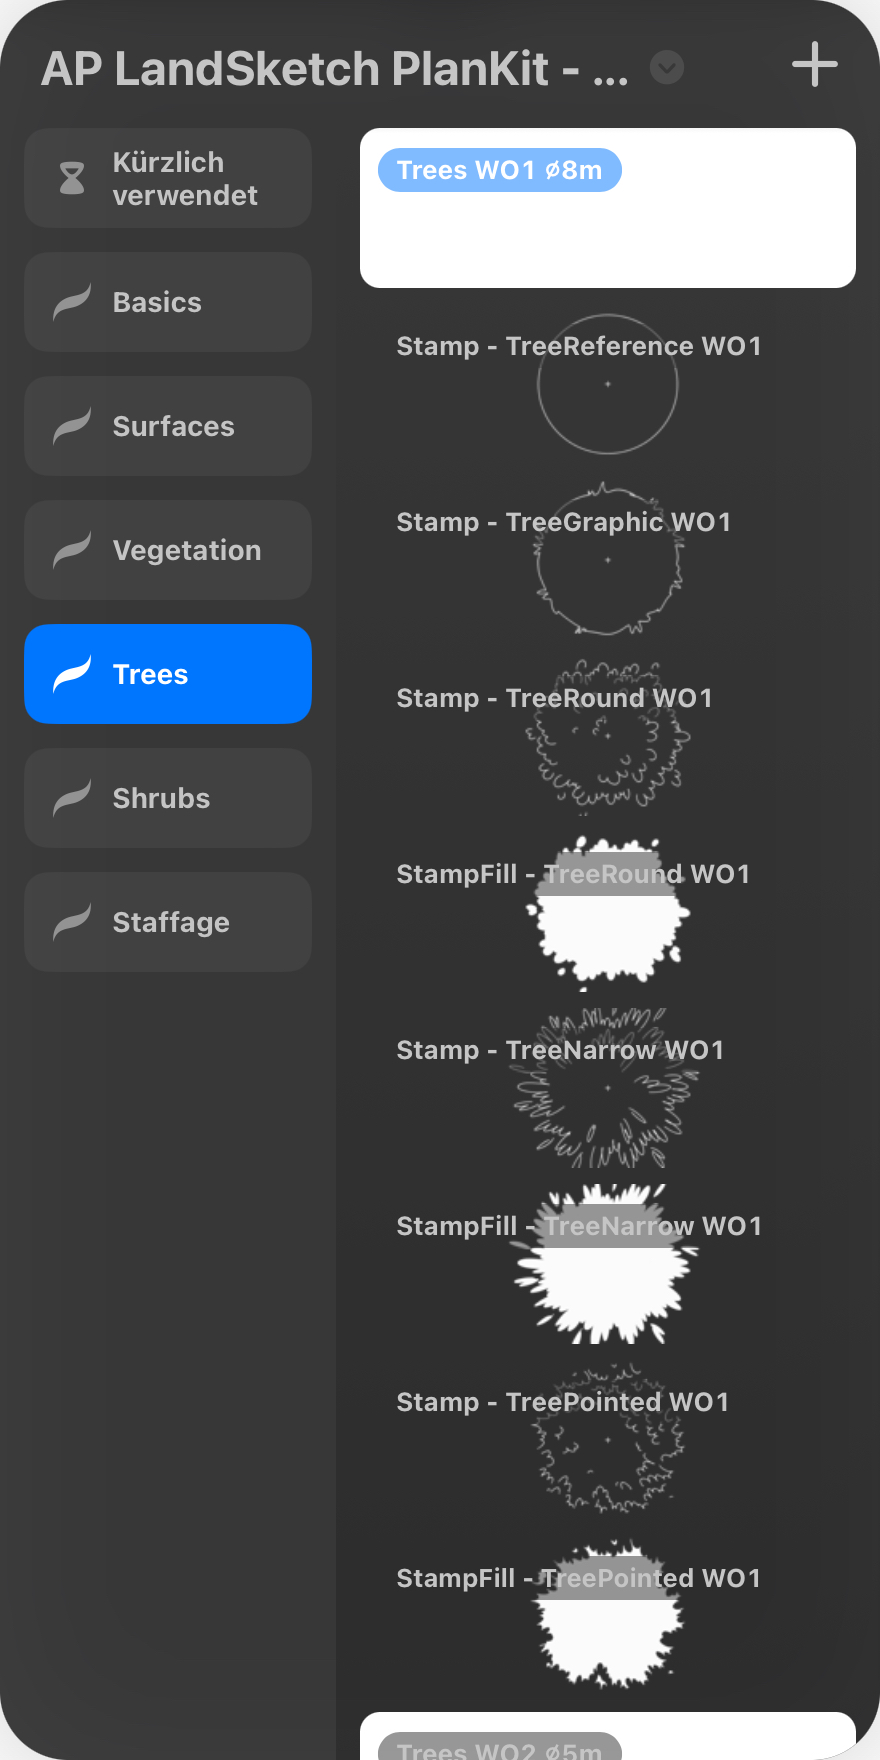
Three growth orders — large trees WO1 (⌀ 8 m), medium trees WO2 (⌀ 5 m) and small trees WO3 (⌀ 3 m). For each growth order the set contains three stamps with round, narrow and pointed foliage. There is also a sizing-reference circle and a graphic tree for each order.
Stamp — TreeReference WO1 / WO2 / WO3
Size helpers — circle at the given diameter. Closed contour, fillable via drag & drop.
Stamp — TreeGraphic WO1 / WO2 / WO3
Reduced graphic silhouettes — for clean plans. Closed contour, fillable via drag & drop.
Stamp — TreeRound · TreeNarrow · TreePointed
Three crown shapes: round, narrow, pointed (conifer) foliage. Per growth order, as linework.
StampFill — TreeRound · TreeNarrow · TreePointed
Matching fill per shape. Stamp the line first, then the fill at the same size, on the layer below. Position the stamp exactly in the cross-centre of the previously stamped crown.
07.05 — Brush referenceSet 05 · Shrubs
Set 05 · Shrubs · L / M / S
Shrubs
Shrubs in three sizes — L (⌀ 2 m), M (⌀ 1.5 m), S (⌀ 1 m). All fillable.
Stamp — ShrubReference L / M / S
Size helpers — circle at the given diameter.
Stamp — ShrubGraphic L / M / S
Reduced graphic silhouettes per size.
Stamp — Shrub #1 / #2 / #3 · L / M / S
Three shrub variants per size — nine stamps in total.
07.06 — Brush referenceSet 06 · Staffage
Set 06 · Staffage
Staffage
Furniture & accessories — all fillable. Stamp orientation follows your display rotation.
Vehicles — Bike · Vespa · Car
Three vehicles in top-down view.
Tables — TableSet 4p / 6p / 8p · Table ⌀ 0.6
Dining sets with seating, plus a small bistro table.
Single seats, bench, lounger, outdoor couch in two sizes.
Outdoor — FirePit · Umbrella · PlantPot #1 / #2
Fire pit, parasol, planted pots.
Tools — Line Fence · Stamp Scale · Stamp NorthArrow
Fence (post spacing 1 m), scale bar, north arrow. Tip on the fence: draw a line and hold briefly at the end — Procreate auto-straightens it, giving a clean, even result.
Chapter 08FAQ & Troubleshooting
08
When something doesn't fit
Frequent questions.
Brush set, layers, stroke and pressure — the typical stumbling blocks and how to work around them.
AP LandSketch PlanKitUser Guide · V1
08 — FAQ & TroubleshootingWhen something doesn't fit
Frequent questions.
Don't see your question here? Drop me a line — so I can keep growing the collection.
Brush set
The set doesn't import correctly into Procreate.
Load the .brushset file directly onto the iPad (Files app / AirDrop) and tap it — Procreate opens automatically. Alternative: open Procreate, brush panel, top + → Import. Minimum version: Procreate 5.
My stamp is too big or too small.
Check the setup: 300 dpi · 1 : 100 · 10 mm grid. One 1-cm grid cell must equal exactly 1 m in the plan, otherwise the scale tips off.
Layers & clipping
Too many layers.
Three ways: (1) merge finished working layers before setting shadows. (2) Shrink the canvas (e.g. A4 instead of A3). (3) Continue on a more powerful iPad.
The clipping mask isn't working.
Three causes: (1) The clipping layer isn't directly above the base surface. (2) The base surface is only outlined, not filled. (3) Alpha lock is on by accident — both have similar icons.
When I stamp a tree, the fill is missing.
Trees with a separate fill use two stamps: outline + fill. Stamp the outline first, then the fill at the same size on a layer below.
The iPad display is sRGB; printing uses CMYK on muted paper. Recommendation: export PDF rather than JPG, test once on your target paper, and if needed reduce saturation in Procreate by ~10 % before export.
The colour palette — AP LandSketch
The colour palette is included with the PlanKit and imports directly into Procreate. It contains the matching colour world for landscape design illustrations.
Colour palette · imports directly into Procreate.